How to Open Disc Cleanup in Windows 10
Even though Disk Cleanup is not a very often used tool in Windows, it still does come in handy and I have found that it does a good job of getting rid of some stuff that other cleaners can't. In Windows 10, you can open Disk Cleanup in a number of ways. In this post, I'll walk you through the different ways to get to Disk Cleanup.
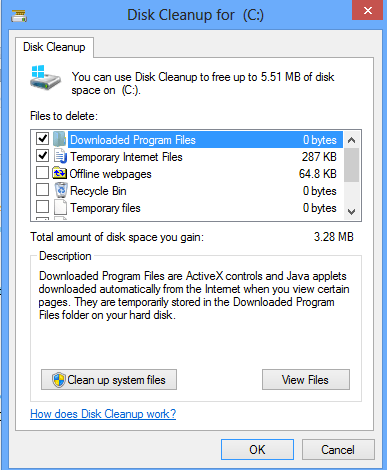
Disk Cleanup via Administrative Tools
The first way to get to Disk Cleanup is to go to the Control Panel and then open Administrative Tools and click on Disk Cleanup. Pretty straight-forward, but kind of a tedious process.
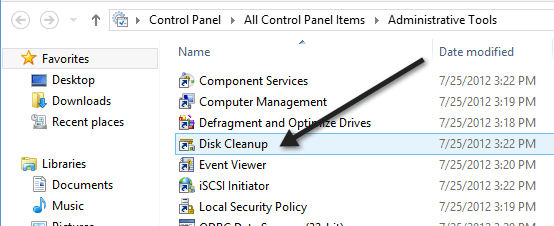
If you happen to be using Windows 8 still, you can read my previous post on how to open the Control Panel in Windows 8 if you're having trouble doing that.
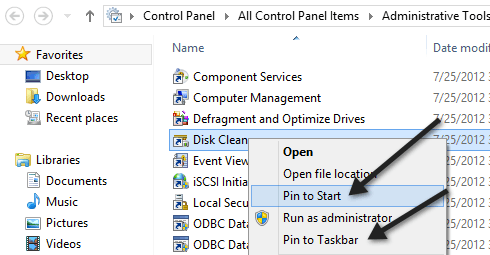
If you really use it a lot, you can right-click on Disk Cleanup in Administrative Tools and choose Pin to Start or Pin to Taskbar.
Disk Cleanup via Run Dialog
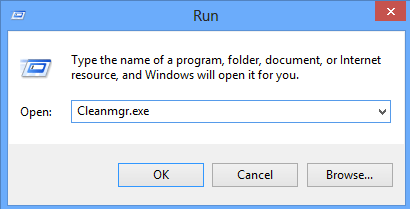
Another way to do this is to open a run dialog and type in the direct executable for disk cleanup. Click on Start, type inrun and press Enter. Type in Cleanmgr.exe.
Disk Cleanup via Disk Properties
You can also open Explorer, right-click on the drive you want to run Disk Cleanup on and choose Properties.

You'll see the Disk Cleanup button located on the right-hand side down where it shows the capacity of the drive.
Disk Cleanup via Start Search
The easiest way to open Disk Cleanup is to simply click on Start and type in disk cleanup. It should be the first result.
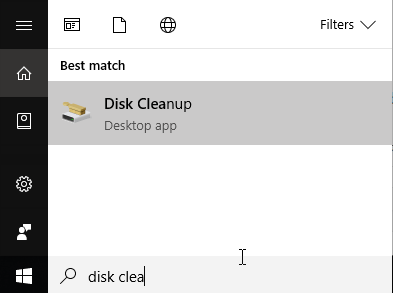
If you are using Windows 8, the easiest way to open Disk Cleanup is to open the Charms bar and then click on Search. Type in Disk Cleanup and then click on Settings.

Click on Free up disk space by deleting unnecessary files. This will bring up Disk Cleanup.
Running the Extended Disk Cleanup
Windows 10 also has an extended Disk Cleanup that can be run, which includes more options than what you get in the standard version. Some sites have stated that the extended version is the same as when you click on Clean up system files in the normal Disk Cleanup dialog, but that's not true.
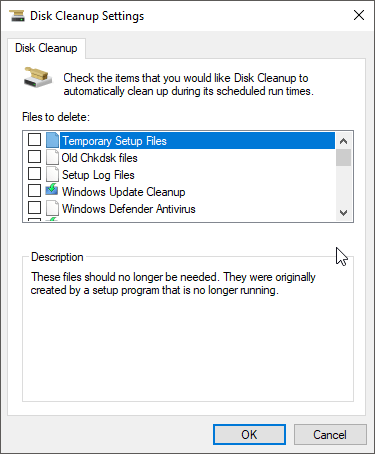
I had at least 11 more options on my PC when I ran the extended disk cleanup and it actually cleared out a few extra GB's that was not removed even after I chose the system files option. You can get to the extended disk cleanup by opening an elevated command prompt and then copying and pasting the following:
cmd.exe /c Cleanmgr /sageset:65535 & Cleanmgr /sagerun:65535

Go ahead and check everything if you like and then click OK. It should definitely clear out more files than it does normally. Obviously, your mileage will vary.
Troubleshooting Disk Cleanup
If you have run into the rare instance where disk cleanup won't run, then there are a few simple things you can try. Firstly, try to run a system file checker scan to make sure all the system files are OK. You can do that by opening the command prompt (Start – type cmd) and running the following command:
sfc /scannow
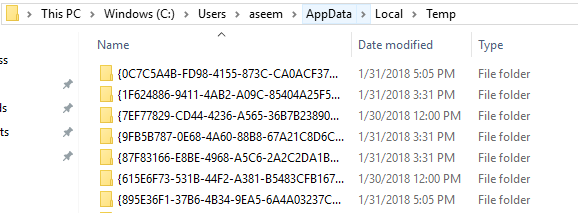
The second thing you can do is to open Explorer and type in %temp% into the address bar and manually deleting all the files and folders located there.
That's about all there is to Disk Cleanup. It's a utility that's been around for ages in Windows and rightfully so. It does an overall excellent job of cleaning out your hard drive without having to install third-party tools. Enjoy!
Do not share my Personal Information.
How to Open Disc Cleanup in Windows 10
Source: https://helpdeskgeek.com/windows-10/how-to-run-disk-cleanup-in-windows-10/
0 Response to "How to Open Disc Cleanup in Windows 10"
Post a Comment